
以下の記事の勢いで記載します。
CLIのインストールや、homebrewのエラーについてはこちらの記事で紹介しているので今回は割愛します。

環境は macOS Mojave 10.14.16 です。
なお、作成の際に参考にしているYoutubeはこちらです。
CLIで雛形のアプリの作成
ターミナルでshopifyのCLIをインストールしたあとに、Node.js(React.jsのフレームワークであるNext.js)のサンプルアプリの雛形を作成します。
CLIで聞かれる項目としては以下を回答。
・Node.js か Ruby on Rails: Node.js
・アプリ名: my-sample-app1-nodejs
・パブリックアプリかカスタムアプリ: パブリック
今回は動画の通り、パブリックなアプリとして作成していきます。
$ shopify create
? What type of project would you like to create? (You chose: Node.js App)
? App name
> my-sample-app1-nodejs
? What type of app are you building? (You chose: Public: An app built for a wide merchant audience.)
Partner organization Partner (xxxxxx)
Using development store xxxxx.myshopify.com
✓ node v10.16.2
✓ npm 6.14.5
┏━━ Cloning https://github.com/Shopify/shopify-app-node.git into my-sample-app1-nodejs... ━━━━━━━━━━━━━━━━━━━━━━━━━━━━━━━━━━━━━━━━━━━━━━━━━━━━━━━━━━━━━━━━━━━━━━━━━━━━
┃                                                                                                                                                                 100%
┗━━ ✓ Cloned into my-sample-app1-nodejs ━━━━━━━━━━━━━━━━━━━━━━━━━━━━━━━━━━━━━━━━━━━━━━━━━━━━━━━━━━━━━━━━━━━━━━━━━━━━━━━━━━━━━━━━━━━━━━━━━━━━━━━━━━━━━━━━━━━━ (3.6s) ━━
┏━━ Installing dependencies with npm... ━━━━━━━━━━━━━━━━━━━━━━━━━━━━━━━━━━━━━━━━━━━━━━━━━━━━━━━━━━━━━━━━━━━━━━━━━━━━━━━━━━━━━━━━━━━━━━━━━━━━━━━━━━━━━━━━━━━━━━━━━━━━━━
┃ ✓ Dependencies installed
┗━━ Dependencies installed ━━━━━━━━━━━━━━━━━━━━━━━━━━━━━━━━━━━━━━━━━━━━━━━━━━━━━━━━━━━━━━━━━━━━━━━━━━━━━━━━━━━━━━━━━━━━━━━━━━━━━━━━━━━━━━━━━━━━━━━━━━━━━━━ (33.56s) ━━
✓ .env saved to project root
✓ my-sample-app1-nodejs was created in the organization's Partner Dashboard https://partners.shopify.com/xxxxx/apps/xxxxx
⭑ Change directories to your new project folder my-sample-app1-nodejs and run shopify serve to start a local server
⭑ Then, visit https://partners.shopify.com/xxxxx/apps/xxxxx/test to install my-sample-app1-nodejs on your Dev Store
ローカルディレクトリにサンプルの雛形が作成されました。
途中で Please open this URL in your browser: https://accounts.shopify.com/oauth/authorize?client_id=xxxx... と出てきた場合は、ブラウザに直接URLを打ち込こんでログインをするとCLI上でも開発パートナーとしてログインができている状態になります。
shopifyの管理コンソールでもアプリが作成されていると思います。

アプリのインストール
続いて、今作成されたアプリを一旦動かしてみたいと思います。shopify serve と打ち込みます。(カレントディレクトリはサンプルアプリがある場所で打ち込んでください。アプリがないディレクトリで売ってもshopify serve was not foundと出てきます。)
$ shopify serve ? Do you want to convert xxxxxx.myshopify.com to a development store? Doing this will allow you to install your app, but the store will become transfer-disabled. Learn more: https://shopify.dev/tutorials/transfer-a-development-store-to-a-merchant#transfer-disabled-stores (You chose: yes) ✓ Transfer has been disabled on xxxxxx.myshopify.com. ✓ curl @ /usr/bin/curl ✓ tar @ /usr/bin/tar ✓ Installing ngrok... https://09609037974e.ngrok.io ⭑ This tunnel will timeout in 1 hours 59 minutes ⭑ To avoid tunnels that timeout, it is recommended to signup for a free ngrok account at https://ngrok.com/signup. After you signup, install your personalized authorization token using shopify tunnel auth <token>. ✓ .env saved to project root ? Do you want to update your application url? (You chose: yes) ✓ Whitelist URLS updated in Partners Dashboard ⭑ To install and start using your app, open this URL in your browser: https://09609037974e.ngrok.io/auth?shop=xxxxxx.myshopify.com ┏━━ Running server... ━━━━━━━━━━━━━━━━━━━━━━━━━━━━━━━━━━━━━━━━━━━━━━━━━━━━━━━━━━━━━━━━━━━━━━━━━━━━━━━━━━━━━━━━━━━━━━━━━━━━━━━━━━━━━━━━━━━━━━━━━━━━━━━━━━━━━━━━━━━━━━━━ ┃ ┃ > shopify-app-node@1.0.0 dev /Users/xxxxxx/my-sample-app1-nodejs ┃ > cross-env NODE_ENV=development nodemon ./server/index.js --watch ./server/index.js ┃ ┃ [nodemon] 2.0.6 ┃ [nodemon] to restart at any time, enterrs┃ [nodemon] watching path(s): server/index.js ┃ [nodemon] watching extensions: js,mjs,json ┃ [nodemon] startingnode ./server/index.js┃ Browserslist: caniuse-lite is outdated. Please run: ┃ npx browserslist@latest --update-db ┃ Loaded env from /Users/xxxxxx/my-sample-app1-nodejs/.env ┃ (node:92173) ExperimentalWarning: The fs.promises API is experimental ┃ Warning: Built-in CSS support is being disabled due to custom CSS configuration being detected. ┃ See here for more info: https://err.sh/next.js/built-in-css-disabled ┃ ┃ event - compiled successfully ┃ Attention: Next.js now collects completely anonymous telemetry regarding usage. ┃ This information is used to shape Next.js' roadmap and prioritize features. ┃ You can learn more, including how to opt-out if you'd not like to participate in this anonymous program, by visiting the following URL: ┃ https://nextjs.org/telemetry ┃ ┃ > Ready on http://localhost:8081
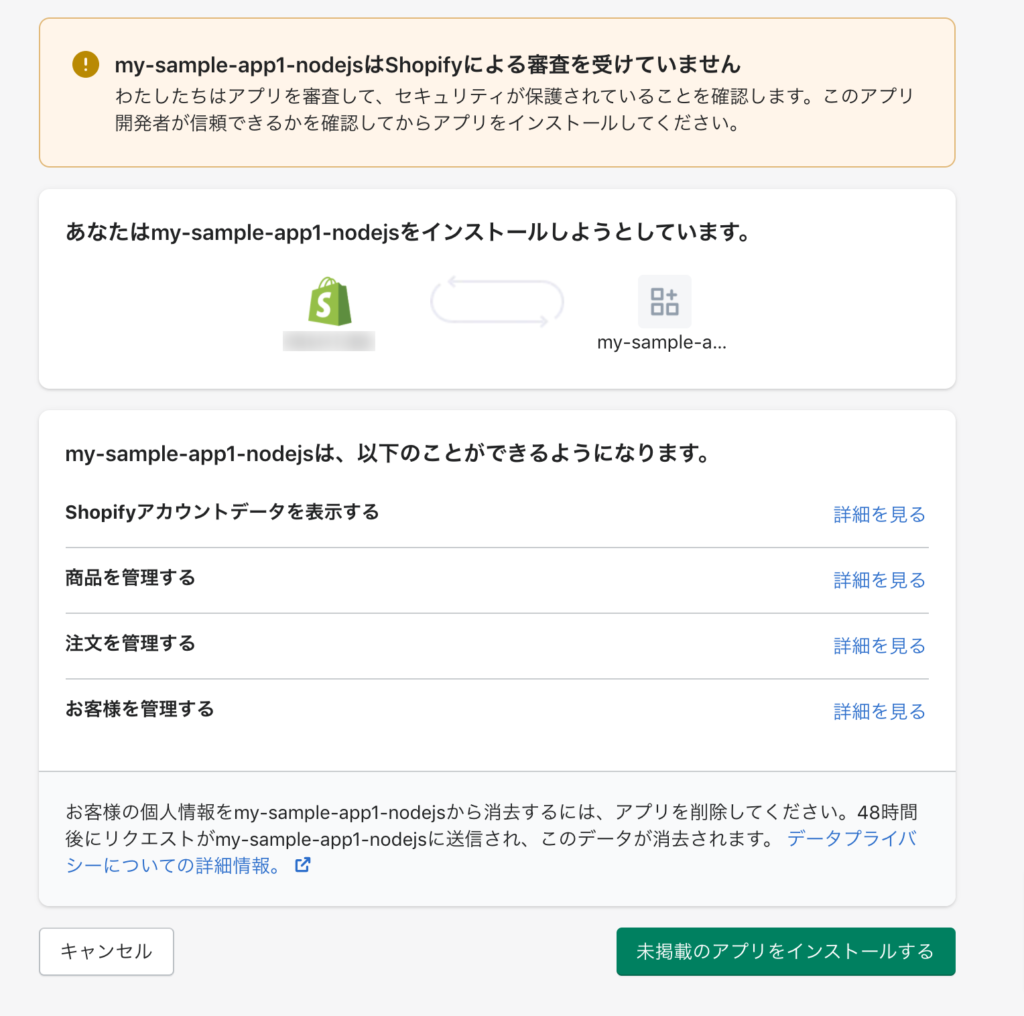
https://09609037974e.ngrok.io/auth?shop=xxxxxx.myshopify.com にアクセス(shop=のあとはご自身の管理ストアのURL)すると以下の画面が出てきますので、未掲載のアプリをインストールするを選択。
shopifyは基本的に外部のURLでないとアプリをインストールできませんが、shopify CLIを利用するとngrokというローカルのサーバーを一時的に外部公開できるサービスを利用しているため、インストールができるようになっています。
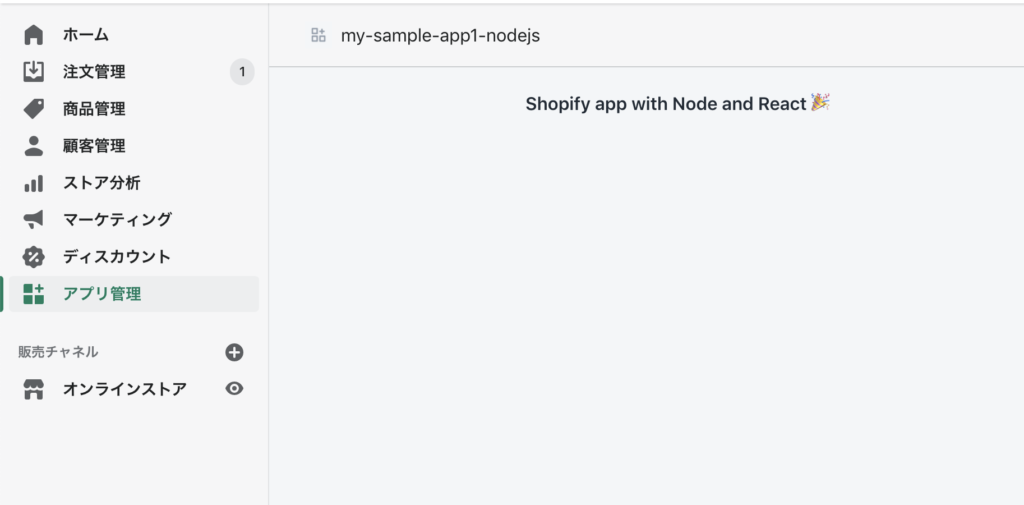
インストールすると以下の用にアプリの画面が出来上がります。
コードを動かしてみる
serveコマンドによりタスクランナーが走っているので、変更を監視してくれています。なので、どこかコードをいじった際にも保存を押すだけで勝手に反映してくれます。
今回は Shopify app with Node and React 🎉 という文字を変えてみます。(動画のとおりですが)
CLIで構築されたコードのpages/index.jsに先程の文字が記載されているので、hello worldというお決まりの文字に変えてみましょう。
import { Heading, Page } from "@shopify/polaris";

const Index = () => (
  <Page>
    <Heading>Hello World</Heading>
  </Page>
);

export default Index;
エディタ上で保存をすると、ターミナルで逐一コンパイルしてくれているので、変更が反映されているか確認します。アプリ管理を見てみます。
> Ready on http://localhost:8081
┃ event - build page: /
┃ wait  - compiling...
┃ event - compiled successfully
┃ wait  - compiling...
┃ event - compiled successfully
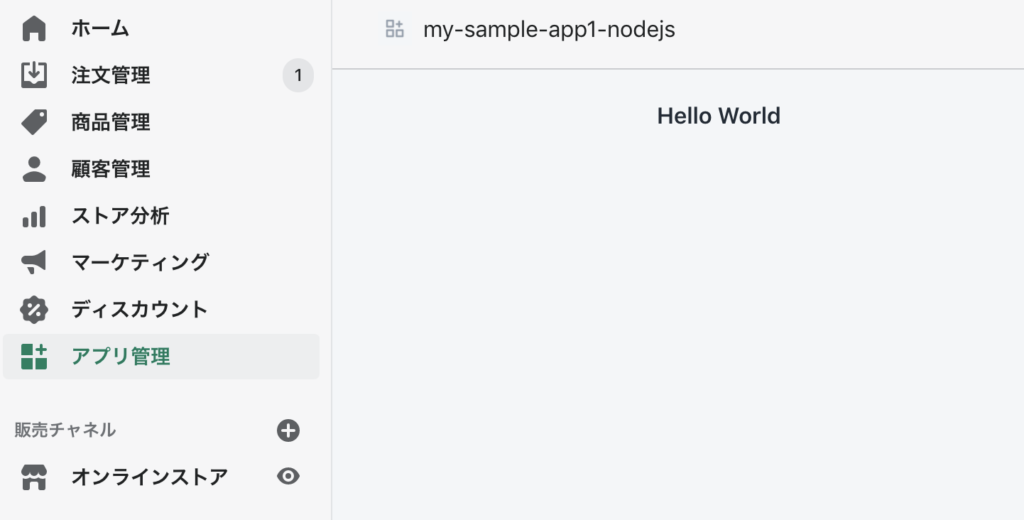
無事に変更が反映されているかと思います。
今回はこのあたりにしておきます。